Ever since the birth of our first child, our house has been exploding with STUFF! Does every family face this challenge, I wonder? Well this family certainly does, despite my efforts to regularly get rid of stuff we don’t need: selling them, donating them, giving them to friends in need. For the past 4+ years, our cars have lost the battle for garage space to all of the kids’ and family gear that clutter our house.
Storage! We need more Storage!
I started by contacting TUFF SHED. Great sheds but pricey! A 8′ x 12′ shed finished and painted would cost us around $3800! Granted that included all materials and the labor to assembly it on our property. Ok, we are not THAT desperate for a storage shed!
Enter Costco. A 8′ x 12′ Everton shed “kit” comes delivered on a pallet, with all the lumber pre-cut with very good assembly instructions. $1100 delivered. But that doesn’t include shingles for the roof. No problem, an extra $300 took care of it.
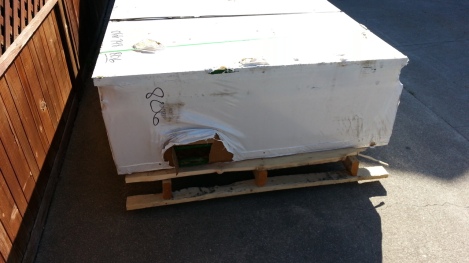
Kitted pallet of the shed.
Start date, August 9, 2014:
I estimated 4 straight weekends to finish the shed, which means 8-hour days for Saturday and Sunday for 4 straight weeks doing it by myself. I came close in total hours, but life did not cooperate with my strict schedule. More on that later…
Rolling up my sleeves the weekend after our daughter’s 2nd birthday, I de-palletized the kit by moving it piece-by-piece into the backyard.
Here’s the kit organized on my back deck. Most of the framing work was done on this deck, in the shade, so I was thankful for that in the August heat that spiked in the 80’s and 90’s.

The contents of the shed kit laid out on the deck.
Here I marked the spot where I planned to have the shed installed. A previously planted orange tree was in the way so I had to move the tree to another spot.
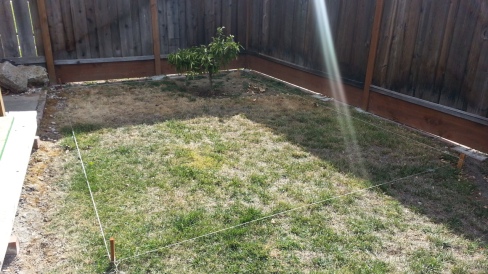
The intended spot marked. Notice the orange tree inside of the lines? It clearly needed to be moved.
I marked it with dissolvable paint and excavated and leveled 6 spots to put cinder blocks for the floor frame.

The intended location of the shed with cinder blocks for support, leveled and squared.
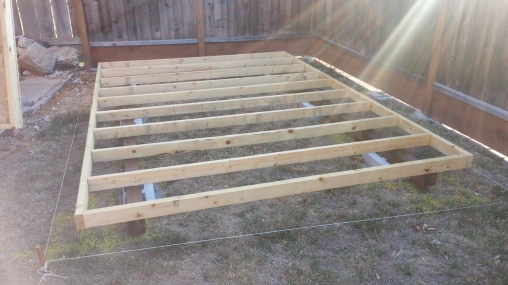
Flooring frame in place.
The floor framing came together pretty quickly, but I needed help carrying it to the exact spot. My cousin Kenny dropped in for a visit one day and I put him to work helping me carrying it to the spot.
Often times, I had to keep an eye on Elliot while I worked, because he wanted to hang out with me regardless of what I was doing. I had to warn him what not to touch and what he was allowed to play with, and he was great for the most part, being a “good listener.”
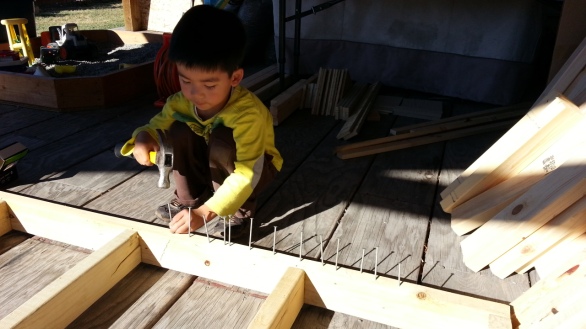
Elliot learning how to handle a hammer and nails.

The wall panels and roofing A-frame I pre-assembled on the deck.
The 4 walls and roofing A-frame came together pretty quickly too, but positioning them together and holding them up temporarily while being nailed down required the hands of a helpful neighbor, Brian, from down the cul-de-sac.

The floor, walls, and roofing A-frame in place.
Adding exterior panels.

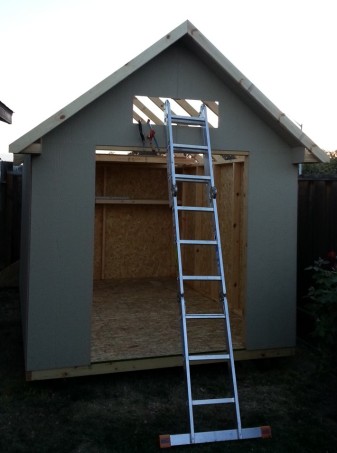
The doors and roof panels installed.

The roof panels fitted with 2×4’s so I can walk across them.
Hoisting the panels up to the roof was a technical challenge, one that made me use my engineering skills to plan and execute. Since these panels are quite heavy to carry up the steep (5:9) roof, I didn’t want to ask my wife for help in case they slip and fall on her, so I resolved to do it by myself. I had to rig up a safety system that kept the panels from falling too much in case they slipped off their intended positions.
Sometime during this project, I had to do some travel to Asia for work so everything was on pause until I came back. I lost a couple of weekends because of this.
After I returned, I had to run to a local roofing supply yard to pick up under layment, shingles, drip edges, a strip of ridge vent, roofing nails, and ridge caps. The ridge vent was an upgrade feature I wanted because it would greatly help ventilate the shed and keep the interior from large temperature swings. Below are stock pictures of what a ridge vent would look like. Cool air comes in through the soffits and exit the vent at the ridge (roof peak).
![M6800 2014-12-30 [36]](https://doiturselfer.files.wordpress.com/2014/12/m6800-2014-12-30-36.jpg?w=428&h=415)
![M6800 2014-12-30 [37]](https://doiturselfer.files.wordpress.com/2014/12/m6800-2014-12-30-37.jpg?w=410&h=421)
Underlayment and drip edges installed, preparing for shingle installation.
Next came the underlayment and drip edges. Just a hammer and a few nails to hold things in place.

Ridge cap covering ridge vent along with the finished roof.
After the starter strip at the bottom of each side of the roof, the shingles were fun to install, but took more time than expected as I made the effort to match the shingle coloration and patterns for a uniform look. Also climbing on such a steep roof made for some very careful work. I hadn’t realized how heavy shingles are; they mainly consist of tar felt paper, tar, and gravel, and lugging them up and down a ladder was laborious and awkward at times.
A few weekends here and there, work was interrupted with out of town guests, our 7th anniversary weekend trip to Monterey, and weekend errands.
I was working against the clock at this point because the weather forecast was rain, so I had to finish the roof to protect the shed. The rest of the exterior came mostly pre-primered already out of the kit so I didn’t have to worry about that.
By the time I was done with the construction of the shed, it was early October.

A Neighbor’s view: As seen from across the street. The shed’s roof is clearly in view.
Since the shed roof is taller than my 6′ fence, I often get people driving by watching what I was doing, and some of the friendly neighbors cheered me on as they watched me pound nails weekend after weekend.
After some rain, I thoroughly caulked all the seams and it was time to paint.
First the primer, then 2 coats of paint (with eggshell sheen). I diligently taped off areas separating the white accent color from the main color.

The shed taped for painting the white accent color.
After a couple of weekends dedicated solely to painting, it was early November, and finally, I was done. It was 4 weekend’s worth of work stretched out over 12 weekends. I count myself lucky as Sabrina minded the kids and took care of other household duties while I worked.
Here’s the final product:

The finished shed.
Below are some close-up details of the shed:

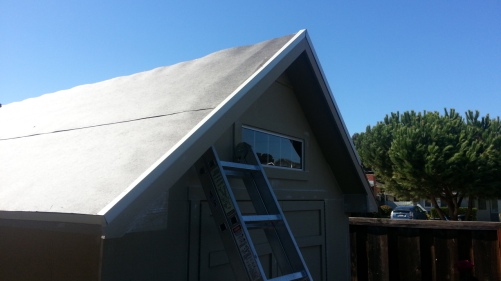
Steep roof pitch.
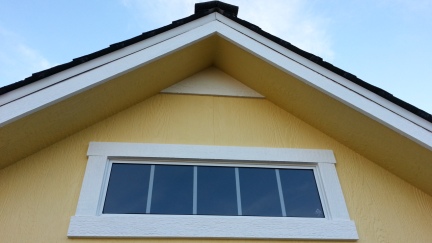
Finish detail: Transom window.

Finish detail: faux hinges

Finish Details: Roof joins the front wall.

Final Details: Roof

Finish Details: soffit inlet vents.

Final Details: back side
I intend to add gutters to this structure to avoid soil erosion from rain run-off, but that will be another project and another post. Maybe even some stepping stones around the front of the shed to give it a finished look…more projects!


 And now comes the tedious part: patching up the holes I’ve made. Fast forward a whole year and I finally get around to patching them up last weekend. It’s been a year since I started this project? Where did the time go? But, it’s finally done now!


![M6800 2014-12-30 [36]](https://doiturselfer.files.wordpress.com/2014/12/m6800-2014-12-30-36.jpg)
![M6800 2014-12-30 [37]](https://doiturselfer.files.wordpress.com/2014/12/m6800-2014-12-30-37.jpg)


